
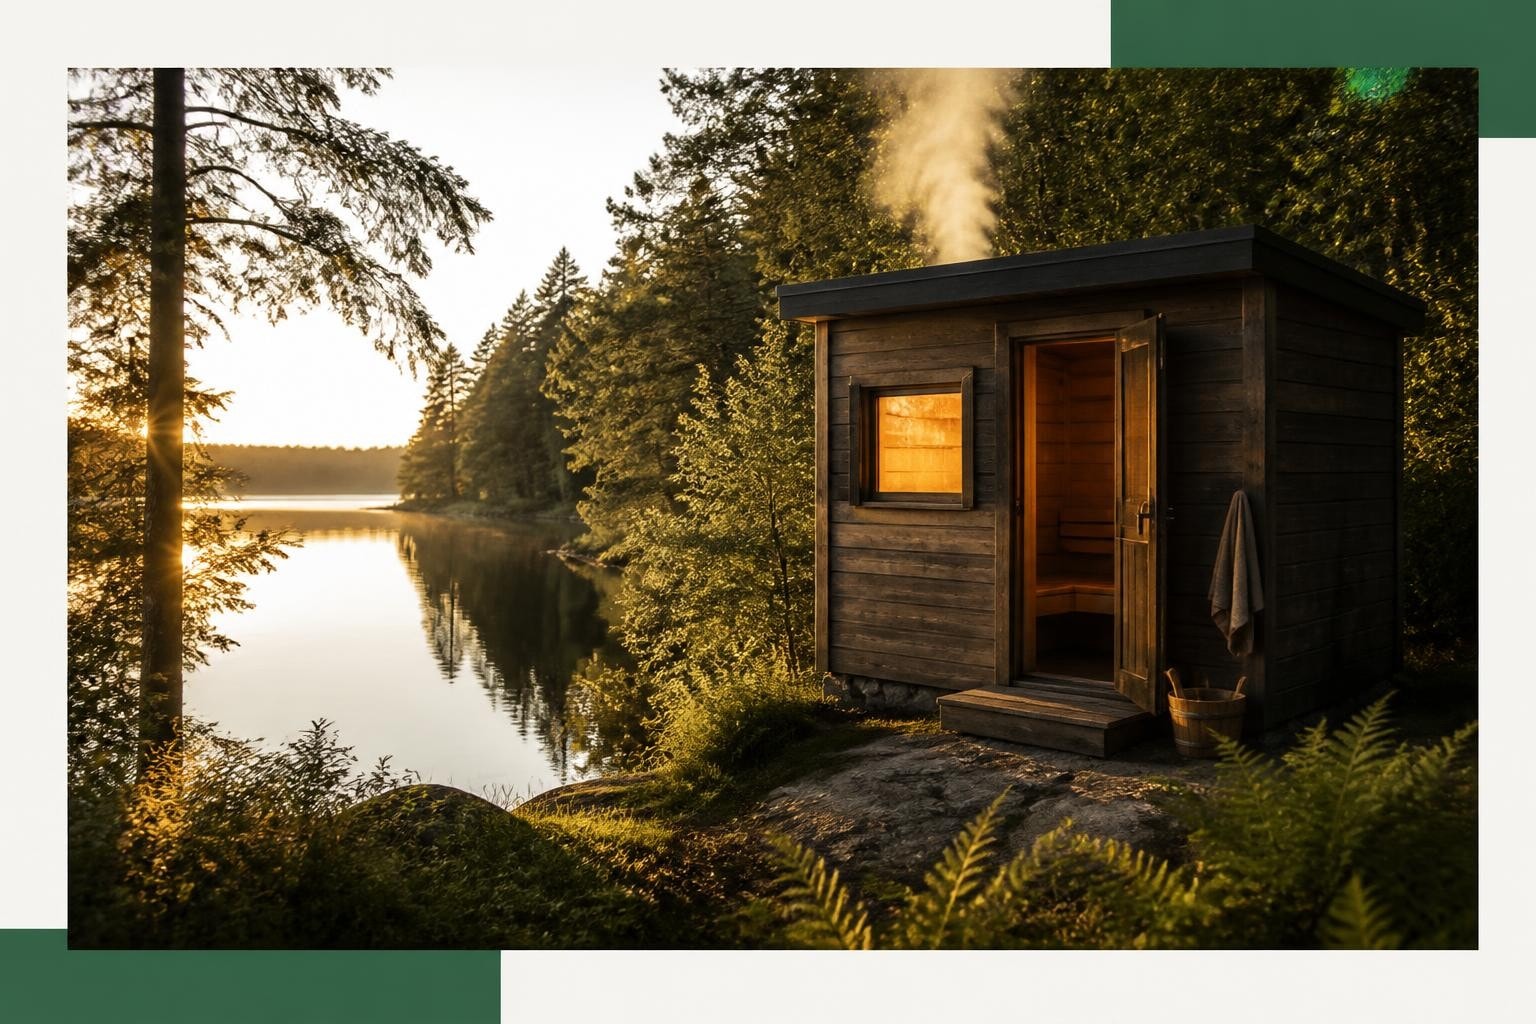
An indoor traditional sauna brings authentic Finnish heat and steam into a basement, bathroom, or dedicated room inside your home. Unlike infrared models, an indoor traditional sauna uses a wood-fired or electric heater to heat stones that produce löyly, the steam that defines sauna in Finland. The heat is dry until you add water to the stones. Then the room transforms. Temperatures range from 160 to 195°F, with humidity controlled by how often you throw water. Installation requires proper ventilation, moisture barriers, and clearances around the heater. Most homeowners choose electric heaters for simplicity and safety indoors.
Indoor Traditional vs Infrared Sauna: Which Heat Method Fits Your Space
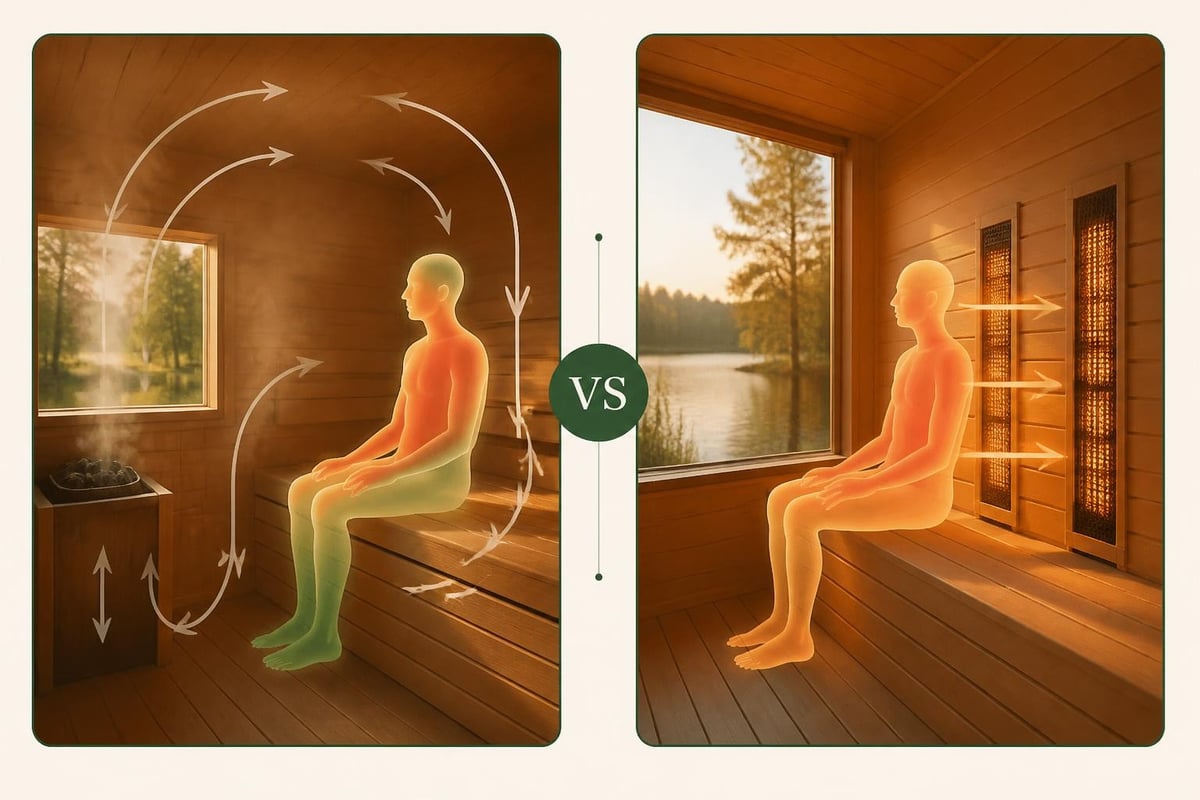
An indoor traditional sauna heats the air and uses stones to create steam. An infrared sauna heats your body directly with panels. The experience differs more than most realize.
| Feature | Indoor Traditional Sauna | Infrared Sauna |
|---|---|---|
| Heat Source | Electric or wood-fired heater with stones | Carbon or ceramic infrared panels |
| Temperature | 160–195°F | 120–150°F |
| Humidity | Adjustable with water on stones | Dry only, no steam |
| Session Length | 10–20 minutes typical | 20–45 minutes typical |
| Power Requirement | 240V for most models | 120V plug-and-play common |
Traditional sauna heat feels intense. Your skin responds quickly. The stones hold thermal mass. When you add water, humidity spikes and the heat wraps around you. Infrared heat feels gentler and takes longer to warm the room. No steam. No löyly. Some prefer the slower build. Others want the Finnish method.
Ventilation matters more with traditional heat. You need fresh air intake near the floor and exhaust near the ceiling. The temperature difference drives airflow. Infrared saunas generate less heat differential and require less aggressive ventilation. Both work indoors, but the installation differs.
Research associates regular sauna bathing with cardiovascular and relaxation benefits, though most studies focus on traditional Finnish saunas rather than infrared models. The heat method you choose should match how you want to feel during the session.
Sizing Your Indoor Traditional Sauna: Room Dimensions and Heater Power
Most indoor traditional saunas measure between 4x5 feet for one person and 6x8 feet for four people. Ceiling height typically stays at 6.5 to 7 feet. Taller ceilings waste heat. Lower ceilings feel cramped.
Minimum space requirements:
- One person: 3x4 feet floor, 6.5 feet ceiling
- Two people: 4x5 feet floor, 6.5 feet ceiling
- Three to four people: 5x7 feet or 6x8 feet floor, 7 feet ceiling
Heater sizing depends on cubic footage and insulation quality. A poorly insulated room needs more power. Standard sizing uses about 1 kW per 45 to 50 cubic feet. A 5x6 foot room with a 7-foot ceiling equals 210 cubic feet and typically requires a 4.5 kW heater.
Most quality electric heaters in North America come from Harvia. The brand dominates because the units are reliable and service centers exist across the continent. Stone capacity matters as much as wattage. A heater with 30 to 40 pounds of stones holds heat better than one with 15 pounds. More stone mass means more consistent temperature when you open the door or add water.
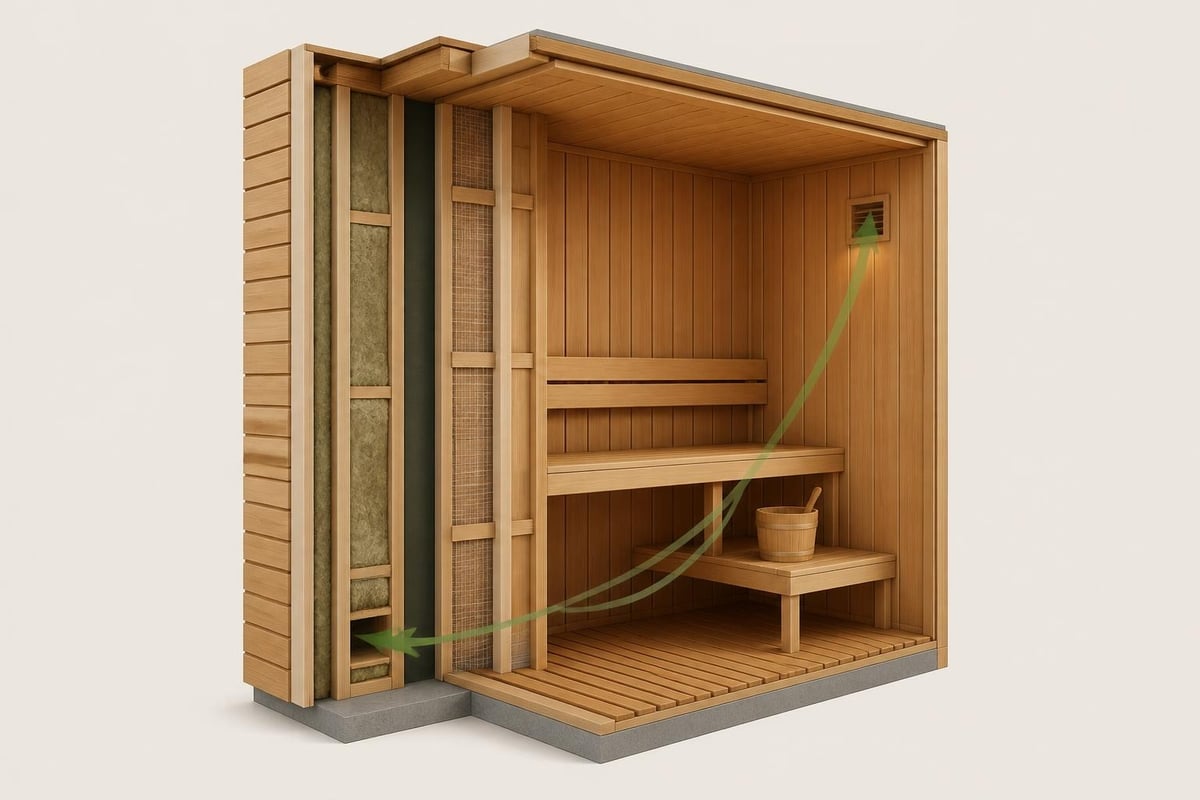
Wall and ceiling insulation should reach R-13 minimum. Foil vapor barriers belong on the warm side of the insulation, facing the sauna interior. This prevents moisture from reaching the wall cavity. Many builders use cement board behind the wood for fire safety and moisture resistance.
When planning an indoor sauna for home installation, measure twice. Doorways, hallways, and stairways limit what you can move into a basement. Prefabricated kits ship in panels. Custom-built saunas go together in place.
Wood Selection and Moisture Control for Indoor Installation
Indoor traditional saunas use softwoods that resist warping and handle temperature swings. The wood must tolerate repeated heating and cooling without cracking.
Common indoor sauna woods:
- Nordic spruce: Light color, minimal resin, widely available, affordable
- Western red cedar: Aromatic, naturally rot-resistant, higher cost
- Hemlock: Smooth grain, low odor, good for those sensitive to cedar scent
- Thermo-treated hardwoods: Heat-modified for dimensional stability, moisture resistance, luxury appearance
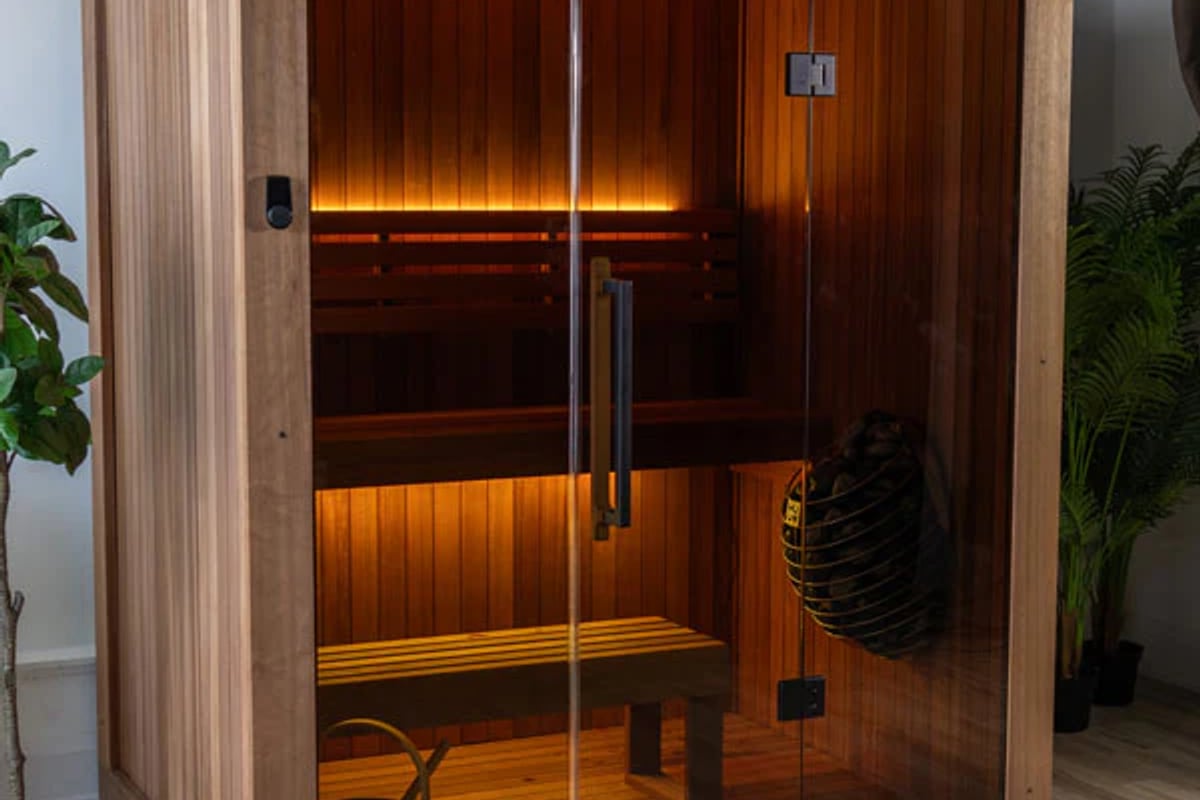
Thermo-treated wood undergoes high-temperature processing that removes moisture and modifies cell structure. The result resists swelling and shrinking better than untreated wood. Builders use it in high-moisture environments where movement would crack joints. The LeisureCraft Loft CT Element Indoor Sauna uses Thermo Grandis, a sustainably sourced hardwood treated in Ontario. The wood maintains dimensional stability even with daily use and offers a refined visual finish that suits modern interiors.
Moisture control starts with the vapor barrier. Install it between the insulation and the interior wood paneling. The barrier stops humid air from penetrating the wall cavity where it would condense and cause rot. Aluminum foil or specialized sauna vapor barrier products work. Seams must overlap and seal with moisture-resistant tape.
Ventilation removes moisture after each session. Crack the door or open a vent. Let the room cool naturally. Wipe benches if water pooled. A fan speeds drying but is not required. The wood will dry on its own if air can circulate.
Avoid treated lumber or plywood inside the sauna. Chemicals release fumes at high temperatures. Use only untreated solid wood or materials rated for sauna use.
Electric vs Wood-Fired Heaters: What Works Best Indoors
Electric heaters dominate indoor traditional sauna installations. They require no chimney, produce no smoke, and maintain steady temperatures with a thermostat. Most models run on 240V circuits, the same voltage as an electric dryer.
Wood-fired heaters offer a different experience. The heat feels softer. The fire crackles. You control temperature by adjusting airflow and adding wood. But installing a wood-burning heater indoors requires a masonry chimney or insulated stainless steel flue that penetrates the roof. Permits, inspections, and clearances add complexity. Most building codes restrict wood-fired appliances in basements.
| Heater Type | Pros | Cons |
|---|---|---|
| Electric | Easy installation, precise temperature control, no chimney needed, low maintenance | Requires 240V circuit, ongoing electricity cost, less traditional feel |
| Wood-Fired | Authentic Finnish experience, softer radiant heat, no electrical demand, works during power outages | Requires chimney and permits, higher installation cost, needs wood supply and cleaning |
Electric heater installation takes a licensed electrician about two to four hours. The unit mounts to a wall with clearances specified by the manufacturer. Typical clearances range from 2 to 4 inches from combustible surfaces. The electrician runs a dedicated circuit from the breaker panel. Most heaters include a contactor and timer installed outside the sauna.
Stone placement affects heat quality. Loosely stacked stones allow air to flow between them. Tight packing restricts airflow and reduces efficiency. Stones should fill the basket but not compress. Replace stones every few years as they crack and crumble from repeated heating and water.
If you want a wood-fired heater indoors, consult a masonry professional and your local building department early. The chimney must meet clearances and draft requirements. Some regions allow it. Others do not. Compare the traditional sauna for home options before committing to a heating method.
Ventilation Design: Fresh Air Intake and Exhaust Placement
An indoor traditional sauna needs continuous fresh air. Without it, oxygen levels drop and the room feels stale. Proper ventilation also removes excess moisture after each session.
The standard design uses a low intake and a high exhaust. Fresh air enters through a vent near the floor, close to the heater. The heater warms the incoming air. Warm air rises, circulates across the ceiling and benches, then exits through a vent near the ceiling on the opposite wall or behind the top bench.
Ventilation layout:
- Intake vent: Low on the wall, 4 to 6 inches above floor, near or below the heater
- Exhaust vent: High on the opposite wall or ceiling, ideally behind the upper bench
- Airflow path: Intake to heater, heater warms air, air rises and circulates, exits through exhaust
Vent size depends on room volume. A common guideline is 1 square inch of vent area per cubic foot of sauna space. A 200 cubic foot sauna needs roughly 200 square inches of combined intake and exhaust area. Split that between the two vents.
Some builders add an adjustable damper to the exhaust vent. Open it fully during use to maximize airflow. Close it partially when heating to speed warmup. Never seal it completely. The room must breathe.
Mechanical exhaust fans are optional. Natural convection works if the vents are sized and placed correctly. A fan helps in poorly ventilated basements or when the sauna sits far from an exterior wall. Connect the fan to a timer so it runs for 20 to 30 minutes after each session.
If your sauna shares a wall with a bathroom, route the exhaust into the bathroom exhaust system. This simplifies installation and removes moisture efficiently. Just ensure the bathroom fan has enough capacity for both spaces.
What I Learned Growing Up with Saunas in Eastern Finland
I grew up on Lake Saimaa, where sauna was part of the daily rhythm. My family's sauna sat at the water's edge. We heated it with birch wood. The smell of burning bark mixed with lake air. After each session, we walked straight into the cold water. No pause, no thought. Just heat, then cold, then stillness. That pattern taught me what recovery feels like before I had words for it. An indoor traditional sauna lacks the lake, but the heat and the stones are the same. Löyly doesn't change because the walls are indoors. You still have the moment when water hits the stones and the room shifts. That moment is what matters.
Placement Options: Basement, Bathroom, or Dedicated Room
An indoor traditional sauna fits wherever you have space, power, and ventilation access. Most homeowners choose one of three locations.
Basement installations are common because the space already exists. Concrete floors handle moisture. Ceiling height often meets the 6.5-foot minimum. Running electrical and ventilation is straightforward. The sauna can sit against an exterior foundation wall for easier exhaust routing. Some basements feel damp. Add a dehumidifier if the ambient humidity stays above 60 percent.
Bathroom installations work when the bathroom is large enough and has an exterior wall. This setup shares plumbing and ventilation infrastructure. Moisture from the shower already exists. The bathroom exhaust fan can serve the sauna if it has enough capacity. Smaller bathrooms require careful layout to maintain clearances and avoid crowding.
Dedicated sauna rooms offer the most control. You design the space from scratch. Insulation, ventilation, and electrical all optimize for sauna use. This approach costs more but delivers the best long-term experience. A dedicated room also isolates moisture and heat from the rest of the house.
Closet conversions occasionally work for a two person sauna if the closet measures at least 4x5 feet and sits against an exterior wall. Remove existing shelving and drywall. Insulate properly. Add ventilation. Verify that the floor can support the heater and stone weight, typically 150 to 200 pounds.
Avoid placing a sauna in a room without exterior wall access. Interior rooms complicate ventilation and require ducting fresh air from outside. The cost and complexity rise quickly.
Insulation and Heat Retention: Keeping Energy Costs Reasonable
An indoor traditional sauna loses heat through walls, ceiling, and floor. Insulation slows that loss. Better insulation means faster warmup and lower operating cost.
Standard wall insulation for indoor saunas is R-13. Use fiberglass batts, mineral wool, or rigid foam. Ceiling insulation should reach R-19 to R-21 because heat rises. Floor insulation is optional in basements with concrete slabs, though adding R-5 to R-10 under a wood subfloor improves comfort.
Gaps around the door leak heat. Use weatherstripping rated for high temperatures. Sauna doors should fit snugly but not seal airtight. A small gap at the bottom allows intake air to enter. Magnetic or latch closures keep the door secure without compressing the weatherstripping too much.
Thermal mass holds heat. Wood has low thermal mass. Stone has high thermal mass. The heater stones and any masonry behind the heater act as thermal batteries. Once warm, they radiate heat steadily. More stone mass smooths out temperature swings.
A well-insulated 6x8 foot indoor traditional sauna with a 6 kW heater typically uses 6 to 8 kWh per session, including preheat and cooldown. At average US electricity rates in 2026, that costs roughly 80 cents to 1 dollar per session. Daily use adds about 25 to 30 dollars per month to your electric bill. Reducing insulation quality raises that cost.
Preheat time ranges from 30 to 45 minutes depending on insulation, heater size, and starting temperature. Some users preheat while they finish dinner or evening tasks. A timer or smart switch can start the heater remotely, though this requires installing the timer according to local electrical codes.
Assembly and Installation: Prefab Kits vs Custom Builds
Indoor traditional saunas arrive as prefabricated kits or get built on-site by a contractor. Kits cost less and install faster. Custom builds offer exact fit and finish.
Prefab kit installation steps:
- Prepare the room: install insulation, vapor barrier, and subfloor if needed
- Unpack panels and verify all parts against the packing list
- Assemble wall panels using tongue-and-groove joints or interlocking brackets
- Install ceiling panels and roof (if provided)
- Mount benches and backrests
- Install heater, stones, and controls
- Add door, handles, and trim
- Test heater operation and ventilation airflow
Most kits use pre-cut panels that snap or screw together. Two people can assemble a small kit in four to six hours. Larger models take eight to ten hours. No special tools required beyond a drill, level, and screwdriver.
Custom builds let you choose exact dimensions, wood species, and bench layouts. A carpenter frames the walls, a contractor installs insulation and vapor barriers, and a finish carpenter applies tongue-and-groove paneling. Electricians handle wiring. HVAC specialists design ventilation. The process takes days instead of hours and costs two to three times more than a kit, but the result fits your space perfectly.
Hiring a professional installer for a prefab kit costs 500 to 1,500 dollars depending on complexity and region. Many homeowners install kits themselves and hire only an electrician for the heater circuit.
Maintenance: Cleaning, Stone Replacement, and Long-Term Care
An indoor traditional sauna requires little maintenance if you follow basic routines.
After each session:
- Wipe benches and walls if water pooled
- Leave the door open for 20 to 30 minutes to let the room dry
- Empty the water bucket
Weekly tasks:
- Sweep or vacuum the floor
- Wipe down benches with a damp cloth
- Check that vents are clear
Every six to twelve months:
- Inspect heater stones for cracks or crumbling
- Remove and rinse stones if dust or mineral deposits build up
- Replace broken stones with matching size and type
- Check door weatherstripping and replace if damaged
- Tighten any loose bench fasteners
Stones crack from repeated thermal shock. Small cracks are normal. Replace stones when they crumble into pieces smaller than a golf ball. Most manufacturers recommend full stone replacement every two to three years with regular use. Stones cost 30 to 80 dollars for a full set depending on type and quantity.
Wood naturally darkens over time from heat and humidity. Light sanding every few years refreshes the surface. Never use stains, sealers, or finishes inside the sauna. The heat will release fumes. Bare wood only.
If mold appears, it indicates a ventilation or moisture problem. Increase airflow. Extend drying time after each session. Wipe visible mold with a diluted vinegar solution. Persistent mold requires checking the vapor barrier and insulation for failure.
Heater elements last ten to fifteen years with normal use. Most units have replaceable elements. Contact the manufacturer when the heater stops reaching temperature or takes much longer to warm up.
Frequently Asked Questions
How much does it cost to install an indoor traditional sauna?
Prefab kits range from 3,000 to 8,000 dollars depending on size and wood quality. Add 500 to 2,000 dollars for electrical installation and 200 to 600 dollars for ventilation materials. Custom-built saunas start around 8,000 dollars and can exceed 15,000 dollars for larger or premium installations. Operating cost averages 25 to 30 dollars per month with daily use.
Can I put an indoor traditional sauna in my basement?
Yes, basements work well for indoor traditional saunas. Ensure the ceiling height meets the 6.5-foot minimum, install proper insulation and vapor barriers, and route ventilation to an exterior wall or existing exhaust system. Concrete floors handle moisture without issue. Check local building codes for electrical and ventilation requirements.
Do I need a special electrical circuit for the heater?
Most electric sauna heaters require a dedicated 240V circuit. A licensed electrician will install a breaker, run wire to the sauna location, and connect the heater according to the manufacturer's specifications. Smaller heaters under 3 kW sometimes run on 120V, but these suit only very small saunas.
How long does it take to heat an indoor traditional sauna?
A properly insulated sauna with a correctly sized heater reaches operating temperature in 30 to 45 minutes. Larger rooms or underpowered heaters take longer. Cold starting temperatures in winter extend preheat time. Better insulation and larger heaters reduce warmup time.
Can I use a wood-fired heater in an indoor traditional sauna?
Wood-fired heaters require a chimney or insulated flue that penetrates the roof and meets local building codes. Installation is more complex and expensive than electric heaters. Most jurisdictions allow wood-fired sauna heaters in detached buildings or first floors but restrict them in basements. Consult your building department and a qualified mason before planning a wood-fired indoor installation.
An indoor traditional sauna brings the Finnish experience into your home, offering heat, steam, and a daily recovery practice regardless of weather or yard space. Proper sizing, ventilation, and heater selection ensure long-term satisfaction. If you have questions about which model fits your basement or how to plan your installation, ask Petri about your sauna. He grew up with sauna on Lake Saimaa and helps homeowners across North America choose and install the right system for their space. Free shipping to the USA and Canada.
Share:
Indoor Sauna for Home: Traditional vs Infrared
Sauna for Men: Heat, Silence, and Recovery Explained