
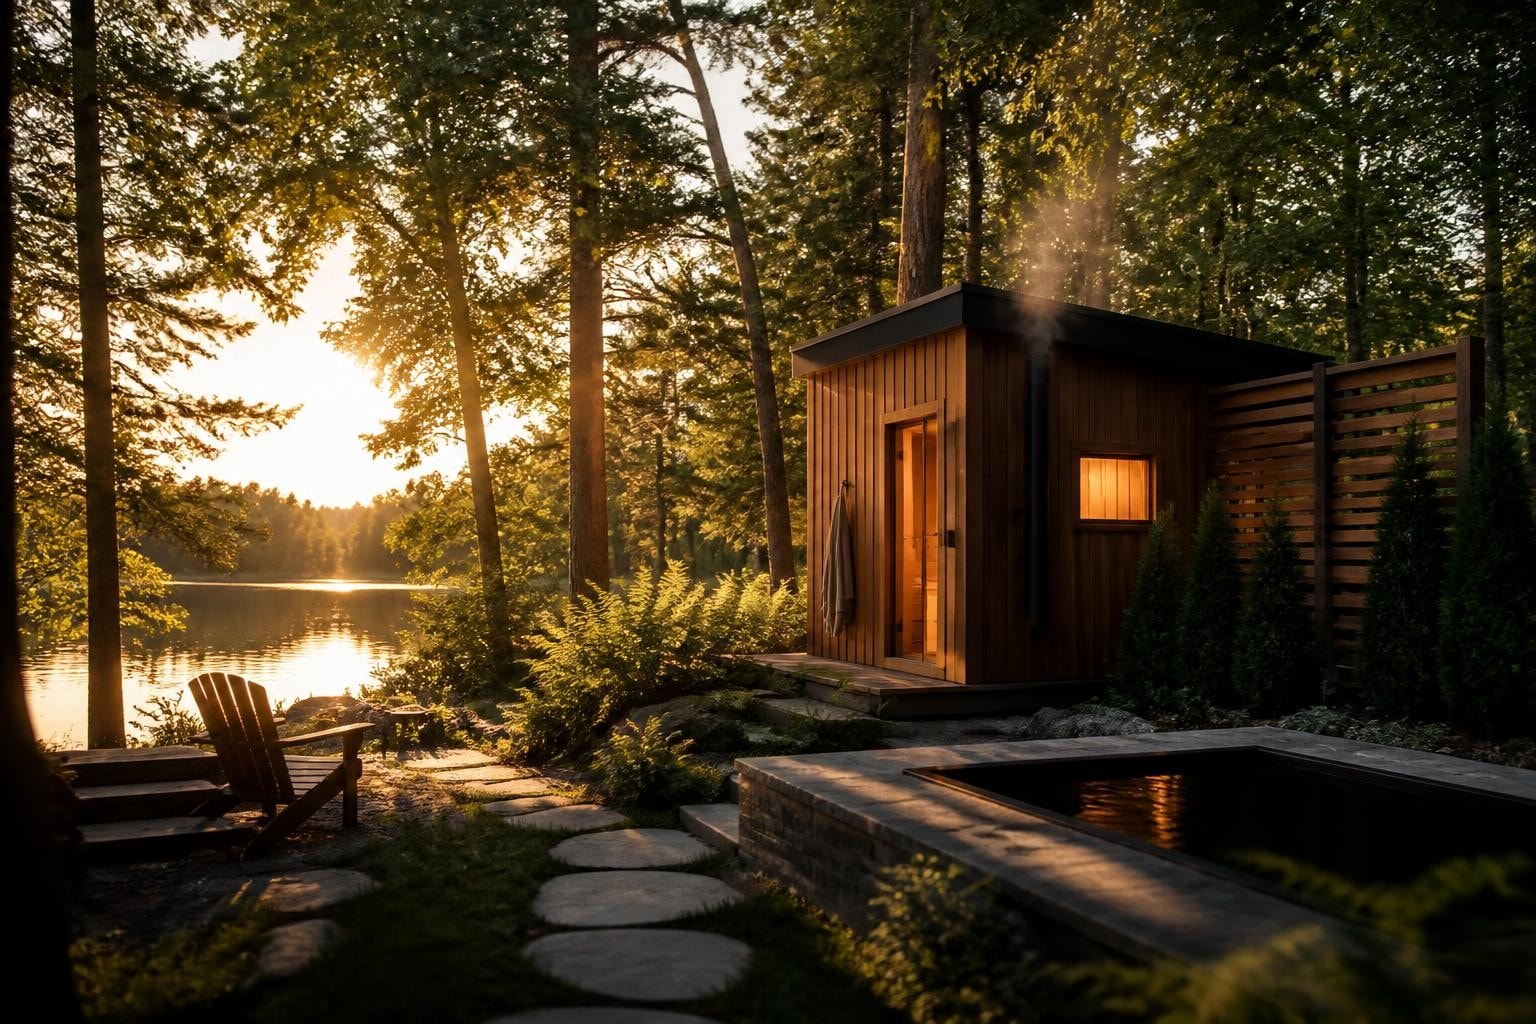
A backyard spa is not a luxury addition. It is a shift in how you recover each day. The best backyard spa ideas combine heat, cold, privacy, and simple access into a routine you can sustain through Minnesota winters and Vermont mud seasons. Heat stress from a sauna followed by cold immersion creates the contrast that Finns call the shift from tension to recovery. This article walks through structures, placement, cold therapy, finishing details, and questions that homeowners ask before they commit.
Core Backyard Spa Ideas That Work
The backyard spa layouts that last share three features: they separate heat and cold zones, they provide privacy without isolation, and they fit the footprint you actually own.
Heat Structure Options
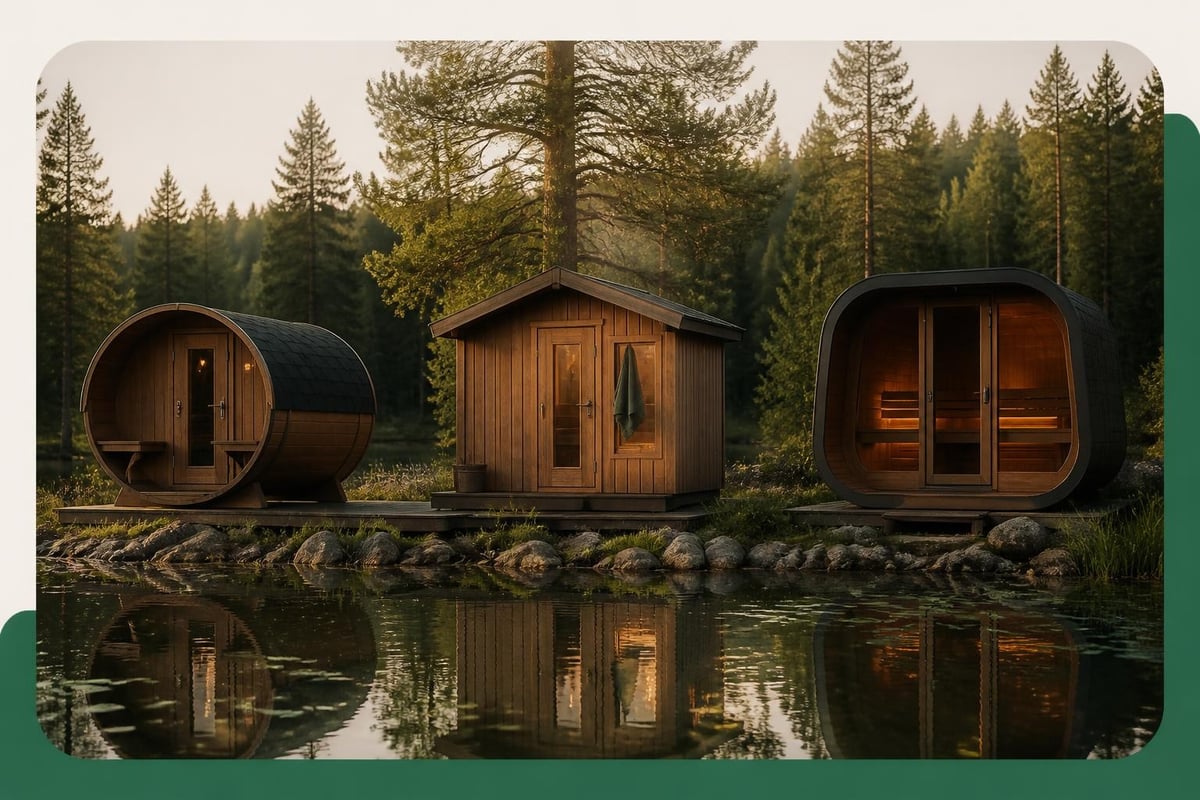
Barrel saunas suit compact yards and quick assembly. The round shape sheds snow and rain naturally. Eastern White Cedar ages to silver gray and requires no stain. Barrel saunas heat fast because of reduced air volume. A 6-foot barrel fits two adults comfortably for 15-minute sessions.
Cabin saunas offer vertical benches, more headroom, and space for families. A 6x8 cabin sauna accommodates four people with tiered benches. The rectangular footprint integrates into corner lots and fence lines. Cabin designs allow for changing areas and porch additions.
Pod or cube saunas deliver modern lines and full glass fronts. These prefab structures ship assembled or in large sections. Glass doors bring in daylight while maintaining heat. The straight walls simplify interior lighting and speaker installation.
Your choice depends on how many people use the sauna at once and whether you value traditional aesthetics or faster heat-up time.
Cold Therapy Placement
Cold immersion follows heat. The placement of your cold plunge or tub determines whether you use it daily or skip it when weather turns.
| Cold Option | Footprint | Setup | Season |
|---|---|---|---|
| Cedar plunge tub | 4x3 feet | Delivered assembled | Year-round with cover |
| Stock tank with chiller | 6-8 feet diameter | DIY assembly | Spring through fall |
| Natural pond | Variable | Excavation required | Seasonal only |
A proper cold plunge like the options from Plunge N' Tubs provides consistent depth and temperature control. Cedar tubs with HDPE liners and stainless bands hold 130 gallons for full immersion. You can add an electric chiller for year-round use or fill with hose water and ice during warmer months.
Stock tanks work as budget cold plunge alternatives. Galvanized steel tanks hold temperature well but rust over time without powder coating. Placement near a hose spigot simplifies water changes.
The path between sauna and cold plunge should be short, level, and slip-resistant. Gravel, pavers, or composite decking handle wet feet better than grass or dirt.
Site Selection and Privacy Design
Where you place the sauna matters more than which sauna you choose. A poorly sited barrel sauna becomes a chore to reach in January.
Distance From the House
Backyard spa ideas that survive winter keep the walk under 50 feet. You will exit the sauna barefoot in snow. A long walk discourages use.
Close placement also simplifies electrical runs. Most outdoor saunas require 240V service. Each additional foot of trench adds cost and complication.
Consider sight lines from the house. A sauna visible from the kitchen window becomes part of daily routine. One hidden behind the garage is forgotten.
Privacy Without Isolation
Neighbors and sight lines shape how often you use a backyard spa. Research shows that backyard wellness is booming as homeowners create outdoor sanctuaries with privacy-focused design.
Fencing options:
- 6-foot cedar privacy fence (most common)
- Horizontal slat fence with 1-inch gaps (airflow with screening)
- Living hedge of arborvitae or boxwood (slow growth, permanent)
- Bamboo screens on posts (fast install, requires maintenance)
Privacy does not mean enclosed. A three-sided fence with open sight lines toward nature creates separation without confinement.
Evergreen plantings screen year-round. Deciduous hedges fail in winter when you use the sauna most. In Finland we plant spruce or pine between the sauna and the road.
Ground Preparation
Level ground prevents structural stress and door misalignment. A sauna floor out of level by two inches will show gaps at the door within a year.
Foundation choices:
- Poured concrete pad (permanent, best drainage)
- Concrete pavers on compacted gravel (adjustable, good drainage)
- Timber frame on posts (elevation, airflow underneath)
- Crushed stone base (simple, seasonal movement)
Avoid placing saunas directly on soil or grass. Moisture wicks into floor boards and causes rot. Elevation allows airflow and simplifies snow removal.
Drainage matters more than most homeowners expect. Water from roof runoff and post-plunge dripping should move away from the structure. A slight grade or French drain prevents pooling.
Sauna Heating and Ventilation
The heater defines the sauna experience. Size, stone mass, and air exchange rate separate a working sauna from a hot box.
Electric Heater Sizing
A proper sauna heater delivers 1 kilowatt per 50 cubic feet of interior space. A 6x6x7 foot sauna has 252 cubic feet and requires a 5-6 kW heater.
Undersized heaters run constantly and never reach proper temperature. Oversized heaters cycle too fast and create uneven heat. Most quality outdoor saunas in North America use Harvia heaters because the Finnish company has tested across climate zones for decades.
Stone mass around the heating elements stores heat and creates the steam when you add water. A 40-pound stone capacity allows for steady löyly without temperature crashes. Smaller stone chambers cool too quickly between water additions.
Ventilation Flow
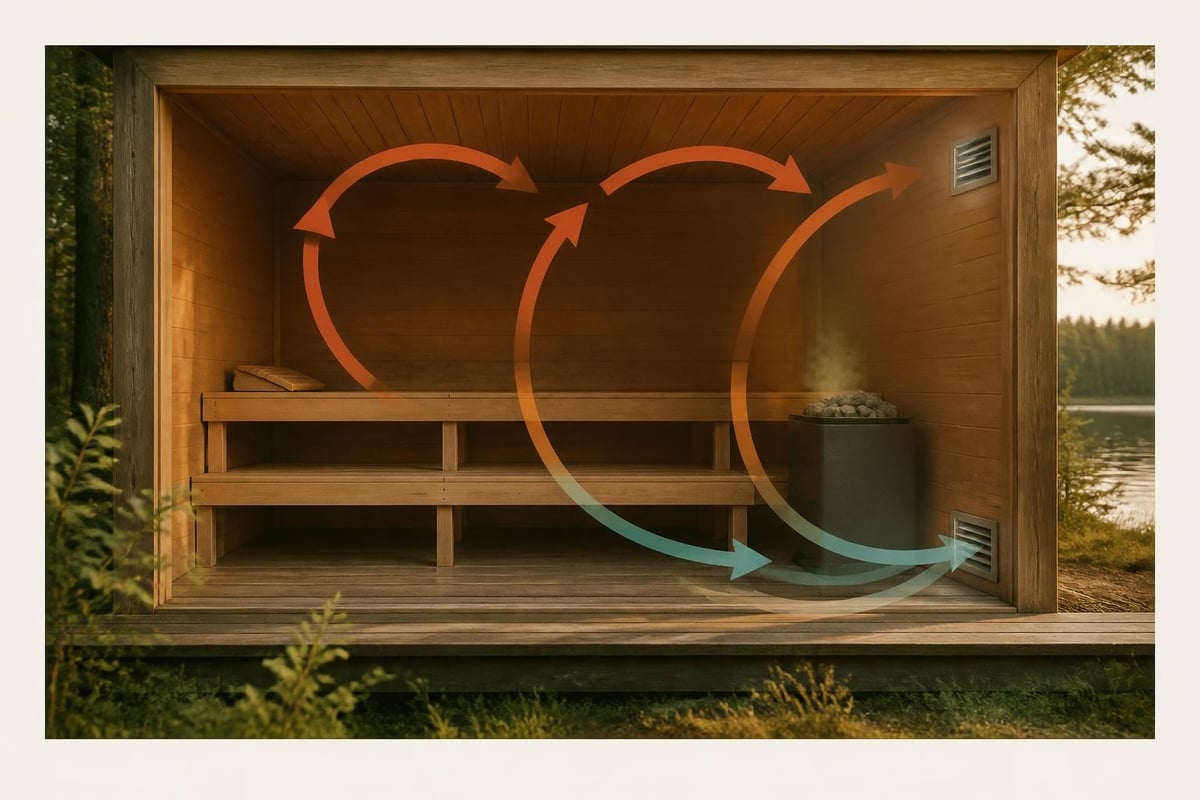
Fresh air enters low near the heater and exits high on the opposite wall. This creates circulation without drafts. A 4-inch intake vent near the floor and a 4-inch exhaust vent near the ceiling exchange air every 6-8 minutes during a session.
Adjustable vents let you control flow. Winter sessions need less ventilation. Summer sessions benefit from increased exchange.
The door should not seal airtight. A quarter-inch gap at the bottom allows passive intake when vents are partially closed.
Wood-Burning vs Electric
Wood-fired sauna heaters create the traditional experience but require more labor. You split wood, load the firebox, and monitor combustion. Heat-up takes 45-90 minutes.
Electric heaters reach temperature in 30-40 minutes with digital controls. No wood storage, no ash removal, no chimney maintenance. Most homeowners in suburban areas choose electric for daily use and regulatory simplicity.
If your property allows wood burning and you enjoy fire tending, a wood stove delivers unmatched stone mass and radiant heat. The löyly from a wood-fired heater has more depth because of higher stone temperatures.
Cold Plunge Setup and Use
Cold immersion after sauna creates the physiological contrast that supports recovery. The science remains associational, not causal. Harvard Health notes that cold plunges may reduce stress markers and improve sleep quality, but individual responses vary.
Temperature and Duration
Most people start at 55-60°F for 2-3 minutes. Regular users work down to 45-50°F over weeks. Colder is not automatically better.
A controlled plunge with consistent temperature trains your body's adaptation better than sporadic ice baths. Electric chillers maintain set temperature regardless of season.
For those exploring cold plunge as part of backyard spa ideas, MD Anderson's review clarifies what research suggests about inflammation, mood, and metabolic response, along with important safety considerations for those with heart conditions.
Standalone vs Integrated Systems
A standalone cedar tub gives you flexibility in placement and budget. You control water changes, cleaning schedule, and seasonal use.
Integrated cold plunge systems with built-in chillers, filtration, and ozone treatment cost more but require less daily management. These systems work year-round without draining between sessions.
Choose based on how often you will plunge. Daily users benefit from automated systems. Weekend users do fine with a simple tub and garden hose.
Shower and Rinse Stations
An outdoor shower between sauna and cold plunge serves three purposes: it rinses sweat before cold immersion, it cools you gradually if full plunge feels too intense, and it cleans you before re-entering the sauna for a second round.
Shower Placement
Mount the shower head on the sauna exterior wall or on a privacy fence. Gravity-fed solar showers work in summer. Electric tankless heaters provide year-round warm rinse.
A concrete or stone pad under the shower prevents mud. Drainage can run to a gravel dry well or connect to existing yard drainage.
Simple outdoor showers cost $200-$400 for basic fixtures. Heated systems with frost-proof valves start near $800.
Winter Operation
Frost-proof outdoor faucets prevent pipe bursting. Install the shutoff valve inside a heated space and slope the exterior pipe for drainage.
Solar showers freeze below 35°F. Electric tankless systems mounted in the sauna or a heated shed provide winter rinse capability.
Many cold plunge users skip the shower in winter and move directly from sauna to ice-cold immersion. The shock is the point.
Outdoor Lighting and Seating
The time before and after sauna matters. A backyard spa needs space to sit, transition, and cool down gradually.
Lighting Layers
Ambient path lights guide you from house to sauna safely in dark months. Low-voltage LED strips on posts or along pathways cost $300-$600 installed.
Task lighting near the sauna door helps with heater controls and towel hooks. A single weatherproof fixture provides enough light without glare.
Accent lighting under benches or along deck edges creates calm without harsh brightness. Warm color temperatures (2700-3000K) match the sauna experience better than cool white LEDs.
Avoid motion-sensor lights. The sudden brightness disrupts the post-sauna calm. Manual switches or timers work better.
Seating and Cooling Zones
A bench or Adirondack chairs near the cold plunge gives you space to sit between rounds. Cedar or teak benches handle weather without covers.
Some homeowners add a covered porch to the sauna structure for year-round shelter. Others place seating under existing trees for shade in summer.
The cooling zone should feel separate from the heat structure. You want psychological distance between the stress of heat and the calm of recovery.
If you plan to expand your backyard space into a more complete wellness area, trends highlighted by Architectural Digest's outdoor forecast show growing interest in connected zones for heat, cold, seating, and natural screening.
Combining Sauna Styles in One Space
A complete backyard spa often includes both traditional and infrared sauna options. Each serves different purposes.
Traditional saunas with electric or wood heaters create high heat and humidity. Sessions last 10-20 minutes with multiple rounds. This is the Finnish practice and the heat that creates löyly.
Infrared saunas operate at lower temperatures (120-140°F) with no humidity. Sessions extend to 30-40 minutes. The radiant heat penetrates differently and some users find it gentler.
A two-person infrared sauna fits indoors or in a covered porch area. It provides daily gentle heat without requiring outdoor space. Pairing a 2 person infrared sauna in a basement or garage with an outdoor traditional sauna gives you year-round options regardless of weather.
If your primary goal is authentic steam sauna with cold plunge contrast, start with a traditional outdoor sauna. Add infrared later if you find you want lower-temperature sessions during recovery weeks.
Assembly and Installation
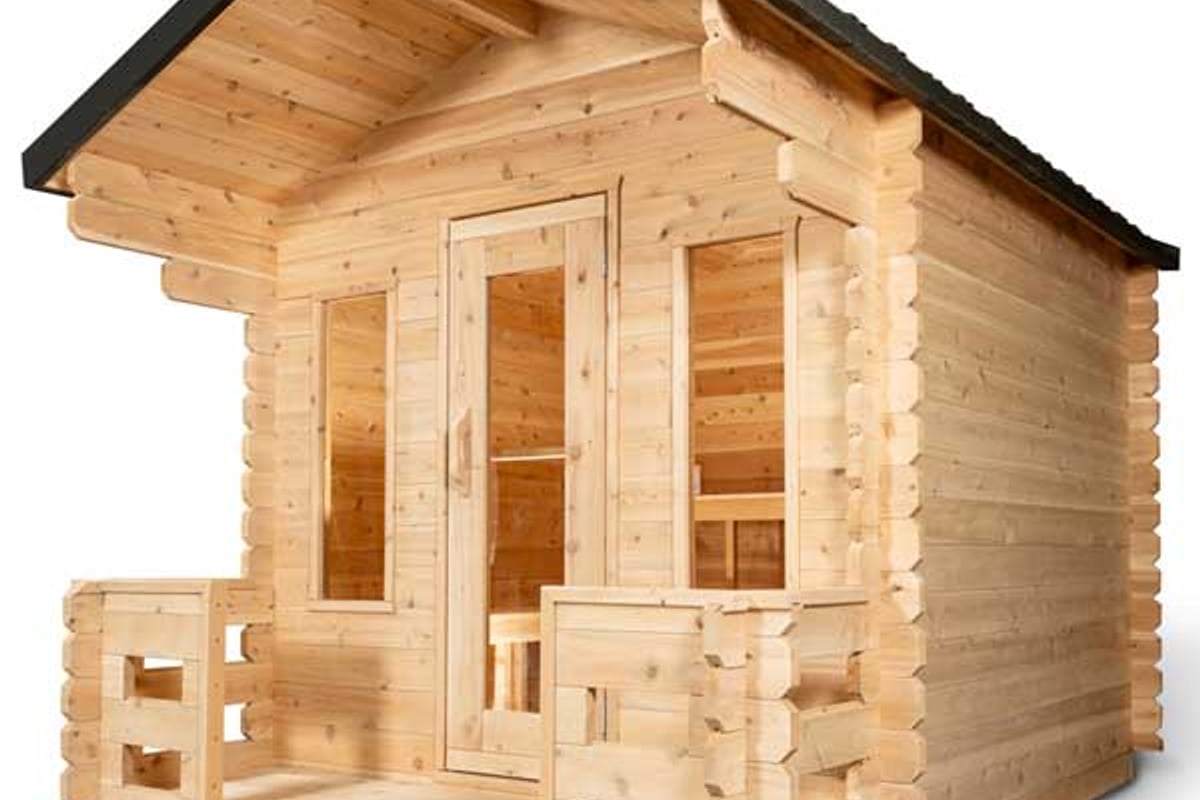
Most outdoor saunas ship as kits with pre-cut panels and detailed instructions. Assembly takes one or two people a weekend with basic tools.
Kit Assembly Steps
- Prepare foundation and confirm level
- Assemble floor frame and decking
- Erect wall panels and corner posts
- Install roof trusses and roofing material
- Mount door and hardware
- Install benches and backrests
- Wire heater and controls (licensed electrician recommended)
- Load stones and test heat-up
Barrel saunas use metal bands to hold staves together. You tighten bands as wood expands and contracts seasonally. Cabin saunas fasten with screws and require no band adjustment.
If you are considering a DIY build rather than a kit, detailed sauna construction guides cover framing, insulation, vapor barriers, and material selection for those with carpentry experience.
Electrical Requirements
A 240V circuit is standard for most outdoor sauna heaters above 4 kW. The circuit should be dedicated with appropriate wire gauge based on amperage and distance.
Hire a licensed electrician for the final connection even if you trench and run conduit yourself. Permit requirements vary by municipality.
Some smaller infrared saunas operate on 120V standard outlets. Verify voltage before ordering.
Permitting and Setbacks
Most municipalities classify outdoor saunas as accessory structures. Requirements include:
- Setback distance from property lines (typically 5-10 feet)
- Building permit if structure exceeds certain square footage
- Electrical permit for new circuits
- Zoning approval in historic or HOA-controlled areas
Rules differ widely. Check local codes before ordering. For comprehensive planning details, including regulatory considerations and design layout, review outdoor sauna design and planning guides that cover permitting and structural requirements.
Some areas restrict wood-burning appliances due to air quality regulations. Electric heaters avoid this issue entirely.
Year-Round Maintenance
Cedar saunas require almost no maintenance but benefit from simple seasonal care.
Exterior Wood Care
Untreated cedar weathers to silver-gray naturally. This is not damage. The wood remains structurally sound.
If you prefer the original honey color, apply a UV-protective sealant annually. Clear sealants preserve color without creating a plastic film.
Power washing removes surface dirt but can damage wood fibers if pressure is too high. A garden hose and soft brush clean most exterior surfaces.
Interior Cleaning
Sauna interiors stay clean through heat and low humidity. Wipe benches occasionally with a damp cloth. Avoid soap or cleaners inside the sauna.
If someone sweats heavily or uses lotions, scrub benches with a stiff brush and water. Allow the interior to dry completely between uses.
Replace sauna stones every 2-3 years. Stones fracture from repeated heating and lose efficiency. New stones improve steam quality.
Cold Plunge Upkeep
Drain and refill plunge tubs every 1-2 weeks for clean water. If using a chiller system with filtration, water lasts longer with occasional chemical balancing.
Wipe down the interior with a soft cloth. Avoid abrasive cleaners on HDPE liners or stainless steel.
In winter, insulated covers reduce heat loss and keep water near target temperature. Uninsulated tubs in cold climates may require constant chiller operation to prevent freezing.
Budgeting for a Complete Backyard Spa
Costs for backyard spa ideas range widely based on structure size, heating method, and cold plunge choice.
| Component | Low End | Mid Range | High End |
|---|---|---|---|
| Outdoor sauna (kit) | $4,000 | $8,000 | $15,000+ |
| Cold plunge tub | $800 | $3,500 | $8,000+ |
| Electrical install | $500 | $1,200 | $2,500 |
| Foundation/site work | $300 | $1,000 | $3,000 |
| Outdoor shower | $200 | $600 | $1,500 |
| Lighting/seating | $400 | $1,000 | $2,500 |
A functional heat-cold contrast setup starts around $6,000 for a basic barrel sauna, simple plunge tub, and minimal site work. Mid-range builds with larger cabins, electric chillers, and finished landscaping run $12,000-$18,000.
High-end backyard spas with custom structures, integrated systems, and architectural lighting exceed $25,000.
Financing spreads the cost over time and lets you start recovery routines now rather than waiting years to save. Most sauna retailers offer payment plans with approved credit.
Backyard Spa Ideas for Small Yards
Limited space does not prevent effective contrast therapy. Compact layouts work if you prioritize function over aesthetics.
A 4-foot barrel sauna fits in a 6x6 foot pad. Place a 4-foot stock tank plunge within 10 feet. The entire footprint occupies less space than a garden shed.
Vertical privacy screens on two sides create separation without full fencing. Lattice panels with climbing vines add seasonal screening.
For extremely small yards, consider placing a compact infrared sauna in a garage or covered patio, then adding an outdoor cold plunge tub in the smallest available yard space. Home saunas designed for indoor use provide one half of the contrast routine without requiring outdoor square footage.
Multi-level decks can integrate sauna and plunge into different elevations, creating visual separation in tight quarters.
Creating Spa Routines That Last
The best backyard spa ideas support routines you can maintain through seasons and schedule changes.
Start with 2-3 sessions per week. Heat for 12-15 minutes, plunge for 2-3 minutes, rest for 5-10 minutes. Repeat 2-3 rounds.
Consistency matters more than duration. A 30-minute session three times a week builds adaptation better than sporadic hour-long sessions.
Track how you feel the day after sessions. Some people sleep better after evening sauna. Others find morning sessions improve focus.
Invite family or friends occasionally but protect solo time. Sauna is not always social. The quiet between rounds is part of recovery.
Winter sauna becomes a ritual if the path is clear and the sauna is ready. Keep a snow shovel near the door and clear the path after storms.
My Take: What Works in Eastern Finland
I grew up on Lake Saimaa where every cottage had a sauna within sight of the water. We heated Saturday afternoons and again on Sundays. The sauna sat 20 meters from the house, close enough to reach in winter but far enough to feel separate. After heat we walked to the dock and into the lake, year-round. That separation between heat and cold, structure and nature, effort and rest, shaped how I see backyard spa ideas. You do not need luxury. You need working heat, cold water, and a clear path between them.
Frequently Asked Questions
How close to the house should a backyard sauna be?
Within 50 feet keeps winter access practical and reduces electrical run costs. Closer placement encourages daily use.
Do I need a permit for an outdoor sauna?
Most areas require permits for structures over 100-120 square feet or for any electrical work. Check local building codes before installation.
What temperature should a cold plunge be?
Start at 55-60°F and work down to 45-50°F over weeks. Consistent temperature matters more than extreme cold.
How long does it take to heat an outdoor sauna?
Electric saunas reach 170-180°F in 30-45 minutes. Wood-fired heaters take 60-90 minutes depending on firebox size and outside temperature.
Can I use a backyard sauna in winter?
Yes. Outdoor saunas work year-round. Snow on the roof insulates. The contrast between heat and cold air is part of the experience.
Good backyard spa ideas start with heat and cold in the right proportions and enough privacy to use them daily. The structures matter less than the routine they support. Finnish sauna culture works because it fits life rather than complicating it. At RecoSauna, I help homeowners find structures that match their yards, climates, and recovery goals. Every question gets a direct answer from someone who grew up in sauna culture and has placed hundreds of saunas across North America. If you are ready to move from research to planning, Ask Petri About Your Sauna.
Share:
Athlete Recovery Room: Setup Guide for Home Training
Backyard Wellness: How to Turn Your Yard into a Recovery Space